Thursday nights are always a tough night in our home for family dinners. The fridge has thinned out from last weekends shopping trip and we have eaten up all our leftovers. Mentally, we are ready for the weekend and don't feel like cooking anything substantial.
Our solution: pull out the waffle iron, it can do much more that make basic breakfast waffles and is a snap to clean!
There are many recipes out there for Zucchini Waffles, but we encourage you to stack ours up against the rest. We find that the other recipes produce a soggy product, while ours have a crunchy exterior and fluffy interior!
Veggie Waffles
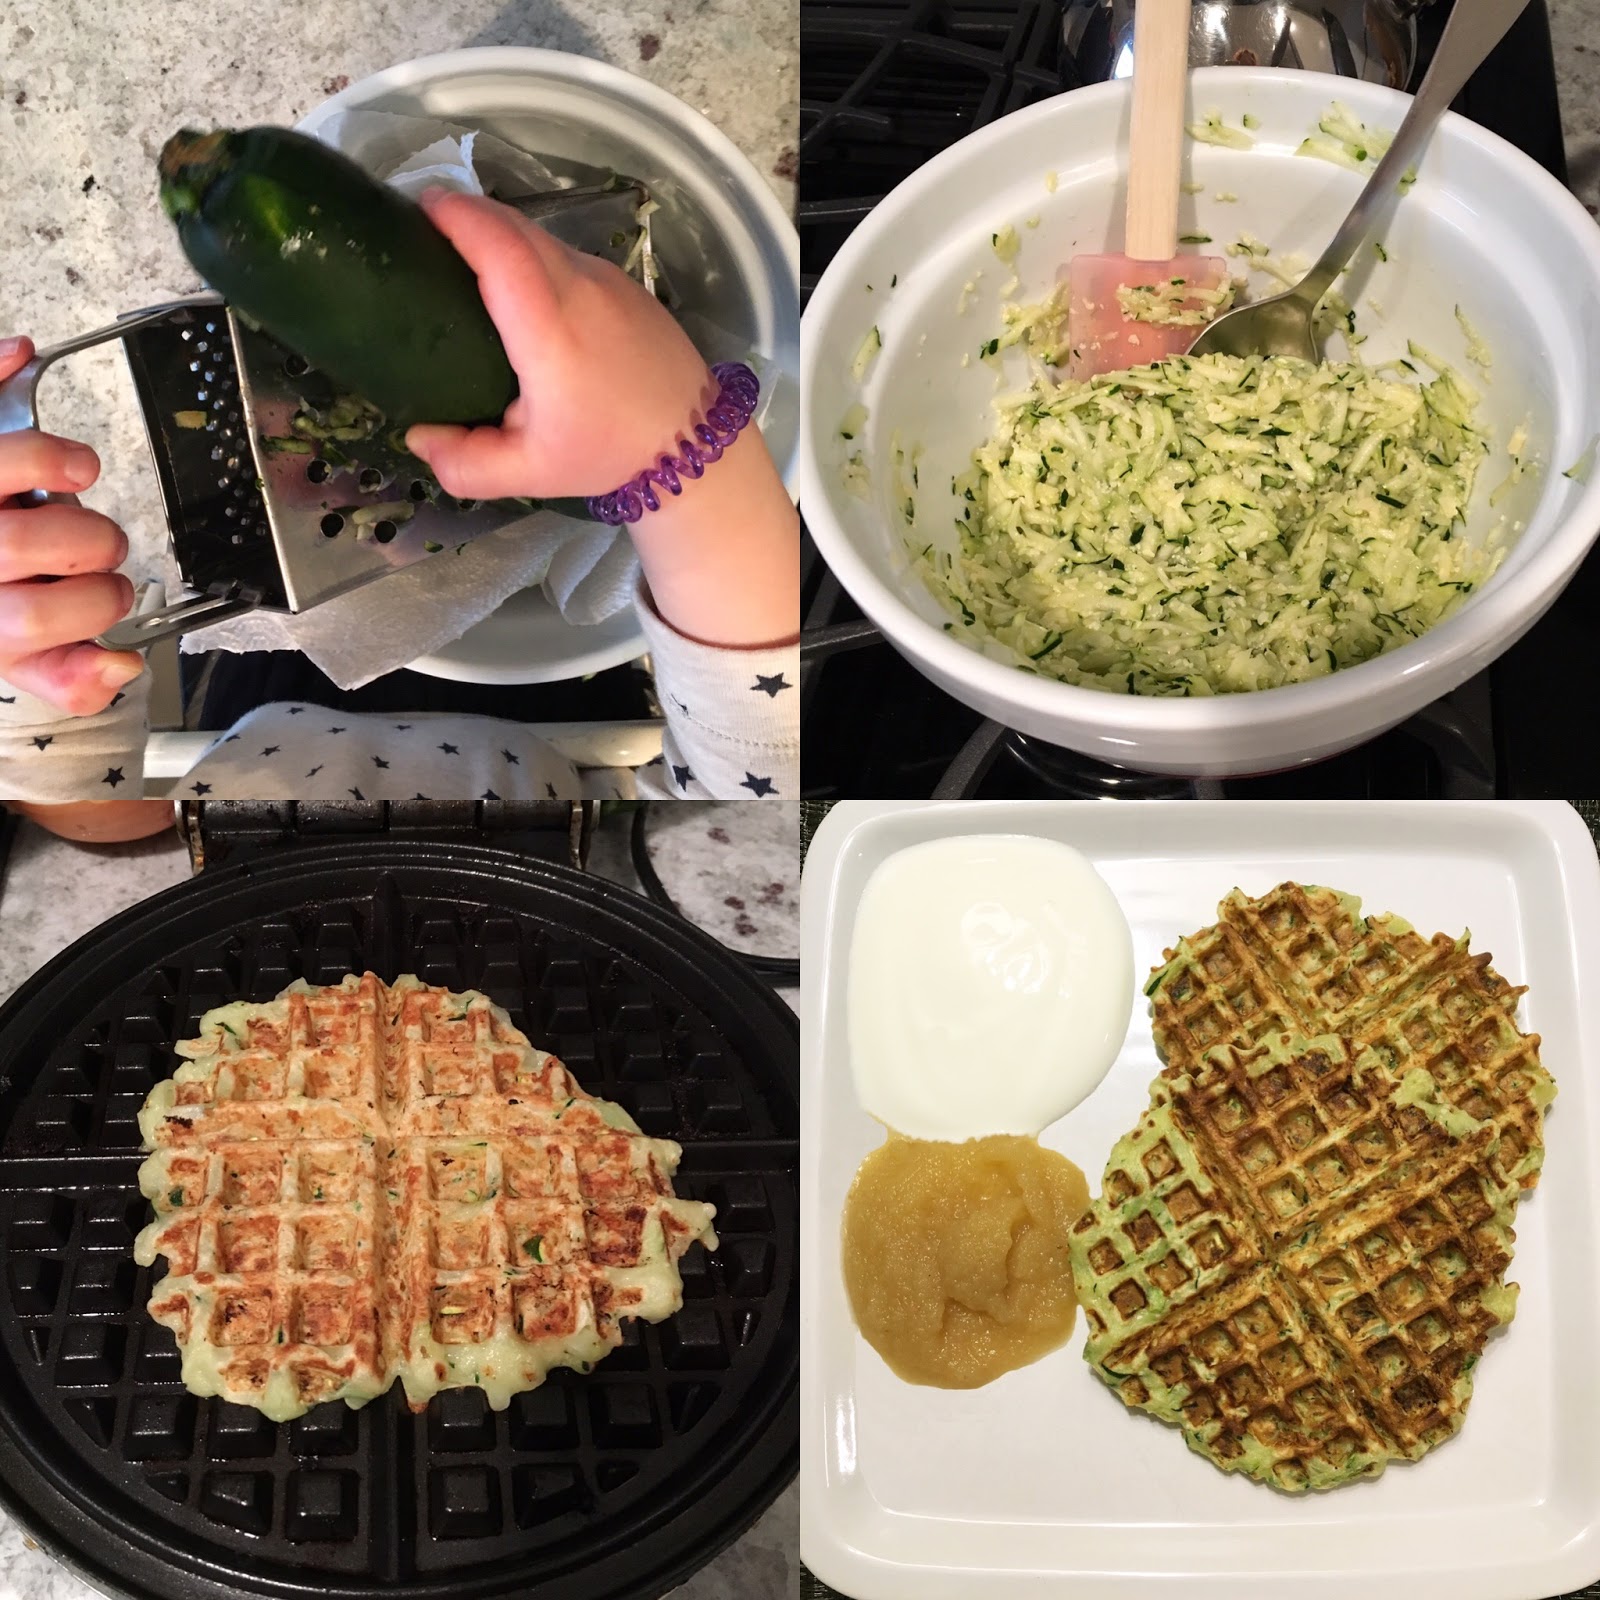
-2 cups of grated vegetable (zucchini, sweet potato, parsnip) feel free to mix a few veggies. The waffles pictured above are made with zucchini. Note*: when grating the vegetables, make sure they are in smaller pieces (about 1 inch in length maximum).
-1 egg
-1/4 cup of milk
-1/4 cup of Parmesan cheese
-1/2 cup of brown rice flour
-1/4 cup of finely diced onion
-1 tsp salt
-cooking spray if your waffle is not a non-stick
Heat your waffle iron on high.
Put your grated veggies in a sieve and cover with paper towel. Push down on the veggies trying to rid them from as much water as possible. (Some veggies, like parsnips, may not leak much water).
In a small bowl whisk together the milk and egg. Then add the Parmesan cheese, brown rice flour and salt. Mix until combined. Lastly, stir in the onion and veggies.
Spoon the batter into your waffle iron and cook until done. Make the waffles any size you want (larger waffles will take a bit longer to cook). Cool on wire wrack.
When ready to eat, pop your veggie waffles in the toaster and toast on medium-high to get crunchy! Serve with applesauce and plain yogurt.